
Expanding your home with a first floor addition is one of the most effective ways to gain extra space without sacrificing your outdoor area. Whether you need additional bedrooms, a home office, or a more spacious living area, building upward is a smart investment. However, one of the most complex and crucial aspects of this type of renovation is constructing the roof for a first-floor addition.
This comprehensive guide will walk Australian homeowners through the step-by-step process of building a roof for a first floor addition, explaining design considerations, construction stages, and key points to ensure your renovation project is successful. If you are planning a first floor addition in Sydney or anywhere else in Australia, this guide will help you understand the process while highlighting why working with experienced renovation professionals is essential.

Why a First Floor Addition Is a Smart Choice
Before we dive into the roofing process, let’s look at why a first floor addition is a popular renovation option:
- Maximises land use: Instead of extending outwards, you build upwards, preserving your backyard space.
- Adds significant value: Properties with first floor additions in Sydney often see substantial increases in market value.
- Customisation opportunities: From high ceilings to stylish rooflines, you have the flexibility to design a home that suits your lifestyle.
- Improved street appeal: A new roofline can give your home a fresh, modern look.
Building upward requires structural planning and professional execution—particularly when it comes to the roof for a first-floor addition.
Step-by-Step Guide to Building a Roof for a First Floor Addition
Step 1: Planning and Approval
The first stage of any first floor addition is thorough planning.
- Council approval: Local councils in Australia often require development applications for significant renovations. Ensure you submit detailed drawings, including roof designs.
- Engineering reports: A structural engineer will confirm whether your existing ground floor can support the additional weight of the new roof and level above.
- Design considerations: Decide on the roof style—pitched, gabled, skillion, or flat. The choice should complement your existing home and comply with local building codes.
Tip: If you’re considering a first floor addition in Sydney, consult with renovation specialists such as Extend A Home, who are familiar with NSW regulations, as they can streamline approval processes.
Step 2: Temporary Roof Protection
Before the new roof goes up, your existing home needs temporary protection.
- Builders often construct a temporary roof covering to shield the ground floor from the weather during construction.
- This ensures your family can continue living in the home while work progresses.
This stage highlights the complexity of installing a roof for a first-floor addition—professional builders ensure your property remains safe and dry throughout.
Step 3: Strengthening the Structure
Your home’s foundation and existing walls must be reinforced to carry the new load.
- Wall bracing and reinforcements are installed.
- Steel beams or timber frames may be added for structural support.
- Engineers confirm the stability before moving forward.
Without this reinforcement, your first floor addition could compromise the safety of the entire property.
Step 4: Building the Roof Frame
Once the base structure is secure, the roof frame is built.
- Roof trusses or rafters are installed according to your chosen design.
- The framing process is critical because it determines the strength and shape of your roof.
- Builders ensure alignment with existing rooflines if blending old and new structures.
If you’re building a first floor addition in Sydney, many homeowners prefer pitched or gabled roofs as they complement traditional Australian building designers while improving ventilation.
Step 5: Installing Insulation and Sarking
Comfort and energy efficiency should never be overlooked.
- Sarking: A reflective foil insulation layer is placed under the roof to protect against heat, moisture, and dust.
- Insulation batts: These are added to regulate temperature and reduce energy bills.
This stage ensures your roof for a first-floor addition is sustainable and compliant with Australian energy efficiency standards.
Step 6: Laying the Roof Covering
With the framework and insulation in place, it’s time to cover the roof.
- Roof tiles (terracotta or concrete) are popular for their durability and aesthetic appeal.
- Colorbond steel is lightweight, stylish, and widely used in first floor additions in Sydney due to its modern look and longevity.
- Flat roof membranes are used for sleek, contemporary designs.
Your choice of roof covering affects not only the look of your home but also maintenance requirements and costs.
Step 7: Installing Gutters and Drainage
A first floor addition requires a well-designed drainage system.
- Gutters, downpipes, and flashings are installed to direct rainwater away.
- This protects both the new and existing structures from water damage.
Proper drainage is essential, especially in regions of Australia prone to heavy rains.
Step 8: Internal Finishing
Once the roof for a first-floor addition is complete, internal works can begin:
- Ceiling plasterboards are installed.
- Electrical wiring and lighting are integrated.
- Interior finishes such as painting and cornices complete the look.
Step 9: Final Inspection and Certification
Before you move into your new upstairs space, the entire project must be inspected.
- Council or private certifiers ensure the first floor addition complies with Australian Building Standards.
- Once approved, you’ll receive occupancy certification.
This ensures your investment is safe, legal, and ready to use.
Key Considerations for Building a Roof on a First Floor Addition
1. Budget Planning
A first floor addition in Sydney can cost significantly more than a ground-floor extension due to structural reinforcements and roofing complexity. Always include a contingency budget of at least 10–15%.
2. Design Harmony
Your new roof should blend seamlessly with the existing structure. Mismatched rooflines can affect both aesthetics and property value.
3. Timeframe
Building a roof for a first-floor addition takes time. Weather, approvals, and supply delays can extend project timelines.
4. Hiring Professionals
Attempting to manage roofing construction without professional help can be risky. Experienced builders not only ensure compliance but also manage project complexities.
Benefits of Working with Professional Renovators
- Expert project management: They handle everything from design to approvals.
- Quality workmanship: Ensures your roof for a first-floor addition lasts for decades.
- Access to resources: Professionals source high-quality materials at competitive prices.
- Safety assurance: Roofing work involves significant risks; professionals ensure compliance with safety standards.
For homeowners considering a first floor addition in Sydney, partnering with renovation experts is the best way to ensure a smooth, stress-free process.
Common Roof Styles for First Floor Additions in Australia
- Gable Roof – Classic triangular roof, great for ventilation and natural light.
- Hip Roof – Sloped on all four sides, offering excellent stability.
- Skillion Roof – Single sloping surface, modern and minimalist.
- Flat Roof – Contemporary option, often used with rooftop decks.
Choosing the right roof style depends on your budget, local council regulations, and overall home design.
Mistakes to Avoid When Building a Roof for a First Floor Addition
- Skipping engineering assessments – Can compromise safety.
- Choosing cheap materials – May lead to leaks and costly repairs later.
- Ignoring insulation – Increases energy bills and reduces comfort.
- Poor drainage planning – Leads to water damage and mould issues.
Conclusion
A first floor addition is a major investment that can completely transform your home and lifestyle. The roof plays a vital role in ensuring structural safety, energy efficiency, and aesthetic appeal. By following the step-by-step process outlined above, and working with professional renovators, homeowners in Australia—particularly those planning a first floor addition in Sydney—can achieve a beautiful, functional, and long-lasting home upgrade.
If you’re considering building a roof for a first-floor addition, the Extend A Home team can help you design, plan, and construct a tailored solution that enhances your home while adding significant value.
FAQs
- How long does it take to build a roof for a first floor addition?
Typically, constructing a roof for a first-floor addition takes between 4–8 weeks, depending on the design complexity and weather conditions. - How much does a first floor addition in Sydney cost?
On average, a first floor addition in Sydney can cost anywhere from $200,000 to $400,000, depending on size, finishes, and materials. - Can I live in my home during a first floor addition?
Yes, many homeowners remain in their property. Builders usually install temporary roofing and manage works to minimise disruption. - Which roof material is best for first floor additions?
Colorbond steel and roof tiles are the most popular in Australia. Your choice depends on budget, design, and maintenance preferences. - Do I need council approval for a first floor addition in Australia?
Yes. All first floor additions require council or private certification to ensure compliance with local building codes and safety standards.
Request a Call Back
Read More
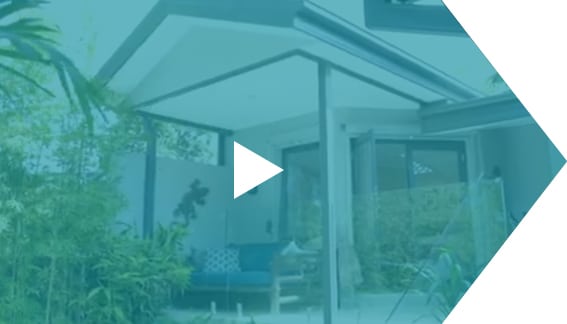
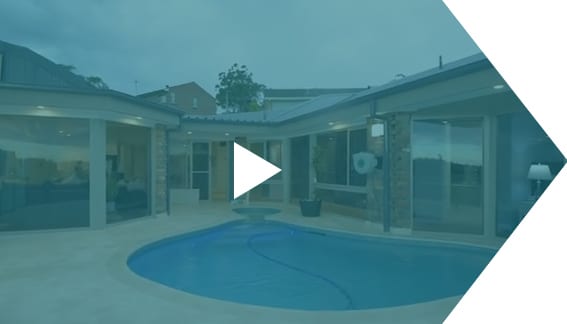
What Our Clients Say


Project: When the house was renovated by Extend a Home, I felt as if we’d doubled our house size.I just felt this was realy the home the would set us up for the next 10 years. The way they designed and built into it, it felt a lot larger, like we got a lot more bang for the buck than we expected we would
Trent & Emma

Project: I feel like I’ve died and gone to heaven in this house.I walk in, and it’s a sense of peace ’cause the openness and the light. It’s like people rent a place like this for their summer holidays and I feel like I’m here.
Deidre


Project:
I felt like my dream had come true. This is a house that we can leave our sons with confidence so it was an investment as much as it was a lifestyle change. With renovating and extending,we’ve got more storage, especially the study and the library. As a handyman myself, I was looking for attention to detail.in the work they did, the quality of the work, so nothing is too hard and it sort of just ran smoothly
Steve & Jane

Project:
When the house was fully renovated, I felt like it was somewhere that I wanted to stay for the rest of my life it really is a friendly home to be proud of, My experience working with Extend a Home was far more pleasant than I ever thought it could be
Michele & Glen

Project: When the house was newly renovated by Extend a Home, we fet so happy, we finally got the property that we’d actually envisaged in our minds and that we always wanted. Its delivered everything that we expected and more
Richard McPartlin


Project: When Extend A Home extended our home I felt that everything was under control while they are managing the project they know what they are doing and I feel that I’m safe in their hands.We needed the space for our relatives that come over and would like to live in this place a bit longer
